Items needed:
- scissors
After you cut out the fabric, take your zipper and place it face down in the middle of the bottom edge of one fabric piece. Since my pillow is 18" wide I'm using a 14" long zipper. This will allow for plenty of space along the side seams. Before anyone runs off I promise that zippers aren't as scary as they seem.
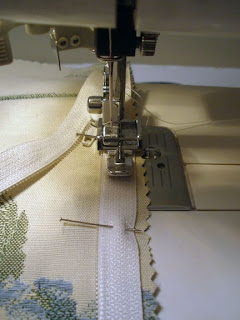
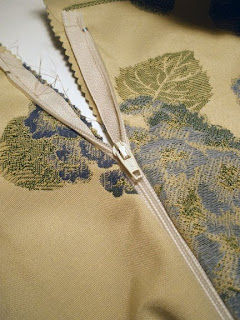
Open the zipper and pin it to the fabric, then sew along the bottom edge using a zipper foot if you have it. Here again, the regular model will work just fine too.
Since your presser foot won't go over the actual zipper you'll need to take the material off the machine, zip up the zipper, then finish the bottom section of the tape just as you did the top. Hooray! One half in!
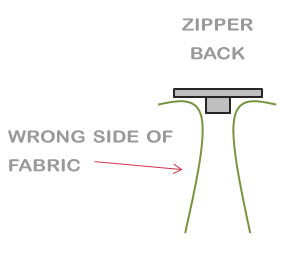
Now you'll need to get the other piece of fabric and pin it to the other side of the zipper tape. Place the second fabric square on top of the first with right sides facing each other. Pin the bottom corners together (temporarily to hold things in place) and then pin the unsewn side of the zipper tape to the second fabric square.
This will probably appear backwards and that's good! When all is said and done the zipper tape will be folded beneath the fabric.
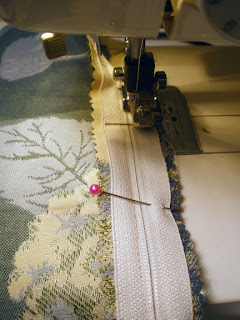
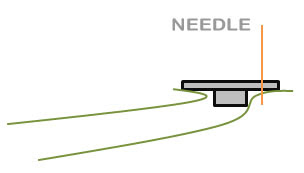
Take your pinned fabric back to the machine and be careful to place the fabric pieces smoothly so your needle will only go through one layer.
Stitch along the edge just as you did the first time. Now stand up and high five yourself! The worst is over and it wasn't even that bad, was it?
With the zipper in you can now sew up the sides of the pillow. A 5/8" seam is standard. Don't forget to open the zipper before you sew otherwise you won't be able to turn it rightside out!
I think it's a good idea to do a little extra stitching at the corners for reinforcement. Also, you may want to clip your corners so they'll be sharp and not chunky from extra material.
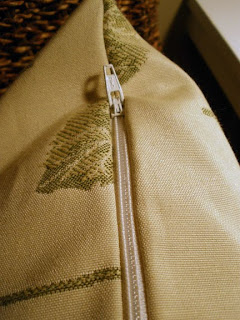
Once everything is stitched turn the pillow rightside out and fill with your form or filler. Zip it up and admire your handiwork!
How great is this? A new pillow with a removable cover, perfect for keeping things clean and allowing you to change up your decor when you get bored or when the seasons turn.
And, what's more, if you can put a zipper in a pillow you can put it in just about anything. Beginners, I hope this was helpful! And as for the pros, how did you get your start in sewing?







Love your pillow. I got my start in sewing in 1973 in Jr High School. Home Ec was so much fun. When we got to the sewing part. We made a skirt. A line with a waistband and zipper. I made mine in a lime green linen fabric. The only problem was we didn't get to finish it before class ended. So my uncle 10yrs older than me had a sewing machine in my grandmother's pantry. He had dabbled in making clothes and given up. I went over to grandmas and asked for the machine. She gladly gave it to me and the rest is history! It's funny, I didn't make a pillow until probably 15 yrs after I started sewing.
ReplyDelete