Showing posts with label McCall. Show all posts

4.19.2010

McCall 5556

Now, tunic time. Although I may need to call it a popover.


This pattern is an out of print number by McCall and I honestly cannot remember when I bought it. I know for certain, however, that it was generally in style when I picked it up, cycled out of style, and now could pass for being semi-fashionable if paired with other articles correctly. Hopefully, my version of View B is appearing more in than out of style. The description might need to change, though, since I found a close match at JCrew but it's called a popover instead of a tunic. Isn't that a bakery good, not a piece of attire? Hmmm.

Pattern Description: If the best part of this pattern is the nicely finished product then the worst part is the time it takes to get there. The pattern envelope says "4 looks, 1 easy pattern." Let me clarify what they mean by "easy." Easy, in this case, means straight seams, minimal darts, little to no fit issues (it's a tunic, y'all), and suggested material that presses well. Easy is not a synonym for "fast," "so straigtforward you can use your instructions as a coffee cup coaster," "start this on a weeknight and plan to wear it tomorrow," or "no need to care about finishing details because it will look professional regardless of what you do." You'll have to invest some time in this one if you want sharp points on the bandings, evenly spaced button loops, and crisp top stitching. All in, I think this was 12 hours of production time.


Instructions: Not bad. In fact, if you can force yourself to really read them, pay attention, and not say, "Whatevs, I know how to sew a shirt, forget this!" then you'll be rewarded with a well-constructed item. The neck, hem, and arm banding are sewn backwards and if you don't pay attention I'm going to bet you'll think it's a mistake in the instructions rather than an intentional approach. Or maybe that's just me....
The pattern does call for a fair amount of understitching. I only did this on the neck band facing, reason being that the other areas that call for understitching can be difficult to get to fully. Personally, I think semi-finished understitching is less desirable than no understitching at all.
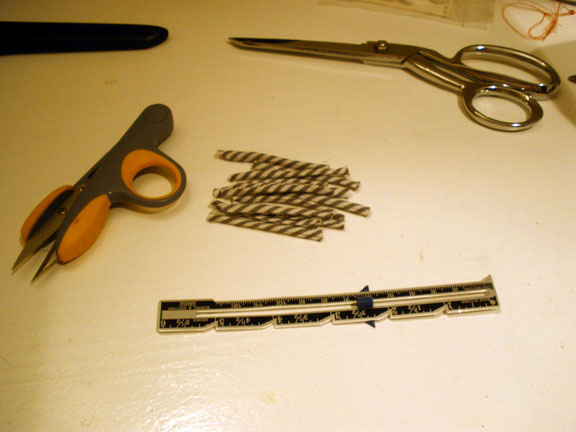
Once you've flipped all the bandings into place you then edgestitch them. I thought this helped
the shirt look a little less home-sewn.


Fabric: The fabric is your basic striped shirting in an ambiguous charcoal gray/navy shade. While the pattern says you can use all kinds of material I'd suggest sticking with the lightweight wovens. There's a lot of folding and flipping going on with this top and thick material could make things sloppy.


Fit: As a tunic/popover/whatever-it-is I don't believe you should be looking to this to show off one's figure. Thus, I did nothing but cut on the line marked "10." I feared this could result in a look of me wearing one of Dad's old shirts for art class. My first fitting came after the last stitch was sewn and mercifully, I was pretty happy with the results.

Finishing: Do you see the serged seam allowances? I love, love, love being able to do this! I particularly enjoy being able to finish off the armsyces with the serger. It cuts down on bulk and looks so much more professional than my past approach of using pinking shears.


Cost:
Fabric = $4.50
Pattern = $1.00 Never pay full price for them!
11 buttons = $13 (!). They're small knots - j'adore, even if it was highway robbery.
Interfacing = $2.00
Total = $20.50

Verdict: I like it. My model shot highlights how thin the fabric is and I'll likely sport a long tank top beneath to hide that shirt-to-jean transition. I suspect I'll get some good use out of it this summer since it's made from a classic fabric and the shape is pretty versatile. It's lightweight for day and the 3/4 sleeves will keep my always-freezing self comfortable at night. And, I'm thinking beach cover-up for sure.

Has anyone else made this shirt (and given half a day to do it?)

4.14.2010

WIP Wednesday: Skinny Jeans Need A Top

For whatever reason, praise for these jeans was going around the interwebs last week. To date I've been terrified and even mildly repulsed by skinny jeans. I've got a long torso and short legs by normal proportional standards so I thought they would equal disaster on me. Nevertheless, I marched off to Gap on the same day I clocked 6 miles running because, hell, if that's not going to make you feel good in jeans not much else will.

Well, I liked 'em. Color me shocked.

So then I got to thinking and a tunic top seemed to be in order. Since I promised Matt I would pick him up at the airport late Sunday night I needed something to help me stay awake. Enter McCall 5556, stage right, straight from the Out Of Print door.

After a few hours of work, I'm embarrassed to say that I've got little to show. It took me 30 minutes to figure out how to turn one strap inside out using this poorly illustrated technique in the instructions. Pathetic!

But I emerged victorious, I cut the two long strings down to size to make the button loops, and I called it a night.

Mom's in town for a conference and she's spending the weekend with us. Hooray for a visit from Mom and her wallpapering skills! The basement bathroom is about to be finished, once and for all.

* Scroll up and over to vote on a dress!*

9.29.2009

Now batting 0 for 2

I have nothing to say.

Alright well maybe just a few things. Go ahead and give McCall's 5980 a whirl, if:

1. You like your jacket peplums to look like Judy Jetson's skirt

2. You enjoy buying the exact fabric the pattern calls for, only to have it produce a horrendous drape (or lack thereof)

3. You prefer to spend your evenings using crappy finishing techniques that clearly give your garment the not-so-coveted "home sewn" label

4. You like your sewing projects half-finished - particularly when it's so bad you gleefully throw it (and a good chunk of change) in the trash just to move on.

That is all.

9.23.2009

New Project: M5980

Let's cut to the chase: it's time to get back to some everyday garments. Or at least those that stand a chance at getting worn more than twice. Enter this jacket from McCall's.

My style of choice is the blue number (A) rather than the red, which takes the term "coat tails" to an extreme.

Fabric choice? A black imported (oooh) wool garbardine fresh off the Vogue remnant racks, naturally. Lining is to be a deep teal satiny substance and I need to find one fabulous button for the front. By fabulous I mean understated yet eye-catching. I'm going for a fresh take on the classic riding jacket here - this will give me an excuse to go buy some knee-high boots and skinny pants to complete the look.

The fabric is cut and tonight comes the lining and interfacing. I took a pic with the zebra drapes in the background to kill two birds with one stone. Look for that tomorrow when the camera battery has been charged.

9.09.2009

I wasn't trying to make a water color...

but judging by the nasty spots left behind by my sputtering iron, you'd think otherwise. So I'm working on the purple plaid dress for this weekend and on one panel of fabric the iron completely misbehaved. I have about 4 half dollar-size water marks on the bottom of the dress and don't know how to get rid of them.

Fabric type, you ask? Excellent question. I'd put it somewhere between a polyester brocade, because of its weave, and a polyester (heavy) taffeta, because of its body. No matter what it is, it doesn't like to hide water spots.

Help?!

7.07.2009

All Tied Up

If anyone's still listening out there I'm here to tell you things have been biz-ay in this corner of the world. Here are some visuals to help fill you in:

1. Graduated from business school on the hottest (in fact, the only hot day we've had) of the summer. I was sporting a lovely purple polyester gown that did not breath one tiny bit of air onto me. Blech. But a good day nonetheless!

2. Less than 48 hours later I started my job.


3. And then 8 days after that we closed on our first house!

And all that's left now is to get married. So about that wedding thing. We're 25 days out, and boy howdy do I have a lot still on the to-do table. I did manage to knock out the kids clothes, though, and the rest of this post details how to downsize (read: remake) a man's tie into a boy's. Read on if you've stayed up nights trying to figure this stuff out. Lord knows it took me a few attempts!
1. To start I used McCall's 4290. Note the size difference in the man's tie v. the boy's. I took the man's apart, laid the pattern piece on top, then cut to size. In the meantime, I also pulled out the interfacing and other "guts" and set them aside. Save the lining too.

2. With the fabric cut down I then took the lining and cut it down so that its triangle was 1/2" narrower and placed it to the right side of the tie front, about 1/2" off of the left side. This is important! Do not center this piece. Stitch a 3/8" seam along the right side only.

3. Now pull the lining over to match it up with the left side, and stitch a 3/8" seam up to the end of the right side stitching. If you've done this correctly, the backside of the tie fabric will be puckering slightly.

4. Now, fold the tie in half, right sides in. Stitch across the tip of the tie, about 1" down from the tip (along where I've drawn the red line).

5. Time for a status check. Pull the lining piece down so that the ends of the tie fold over onto themselves and you get the little square at the tie point. Turn the tie right side out. If all has gone well, you should have one sharp looking tie point!

6. Return the tie to inside-out. Iron into place (this is the part that takes some patience and fabric wrestling), then stitch the lining and tie sides together, a 3/8" seam on each side. Take the stitching all the way up the sides to that it goes off the edges of the pointed part of the tie. *** These steps also work to finish the necktie end***

7. Now once again, turn the tie right side out. The sides should naturally fold in. Grab the original piece of interfacing from the tie and trim it so that it matches the "fold" lines on your child's pattern piece.

8. Insert the interfacing into the pocket you've made with the lining. You don't have to stitch it into place but it helps to pin it temporarily. Roll the sides over to cover the interfacing, then fell stitch the seam together. You'll want to stitch a small fabric loop to the back to catch the tie end (not shown here on mine but on the original one).

9. Flip it over and admire your work!

Alright, so that settles things for the munchkins. I've been cranking out some wedding favors that are freakin' cute if I do say so myself, but they'll stay under wraps until after the big day.

4.27.2009

Kids' Clothes - Part 1

As promised, I'm back with a post about the flower girl's dress (or dresses, as it turns out). You'll notice that this post is titled Part 1, implying there will be a Part 2. Right you are! That will come tomorrow.

Anyway, I've got two sundresses for the staring darling and I'm pretty happy with both. First, some explanation as to why there are two. Long before I settled on bridesmaid dresses or any other wedding day colors I found a bold crunchy taffeta home dec fabric that I just adored. I quickly snatched up enough to make a dress without a care in the world if it would ever get a place in the wedding; I just wanted to see the fabric come to life in some way. So, here's #1. It's brought to us by the out-of-print Simplicity 8610 pattern that I can't even find online (sorry!):


Nevermind the fuzzy photo - check out those matched seams!

The dress is fully lined in a carnation pink polyester china silk with invisible zipper.

Fast forward about 4 months when I finally, if somewhat hastily, settle on the color for the 'maids. As mentioned, it's a variation of teal and has the amazing ability to make dress viewers yawn when it's on the hanger but then suddenly wake up when it's being worn. In short, seeing is believing with this dress. Since everything else in the wedding is either gray or ivory I really thought for an instant that the flower girl could still wear the checked dress and all would be swell. Not so much.
This led to me looking around for both a color that would complement the teal and a fabric that would be appropriate for a mid- to late-summer wedding. Enter buttercup yellow with white stripes (and cue looks of disbelief from anyone who knows me and is aware of my typical aversion to yellow). I found a remnant at Vogue and thought I'd give it a try. Dress #2 is from Butterick 3762 with absolutely no extras on it (collar, sleeves, pleated waistband - nothing).

This dress is not yet hemmed because I'm waiting until we go to Virginia in a few weeks and the flower girl can try it on. Everything else is complete though. The sash loops were done with embroidery thread in white because I am assuming that the teal sash will be exchanged for a white or yellow one post wedding soiree. You can probably tell that dresses 1 and 2 are virtually the same style but 2 is longer. Again, depending on the "fitting" next weekend I will hem it just a little or several inches!
So what to do with #1? I'll be passing it over as an option for the rehearsal dinner. I'm certainly not one to dictate what the wedding party must wear for two days but I figure, hey, it's made and I sure can't get any use out of it!

2.06.2009

CAB Dress - #3 (Or, Why Chiffon Is A Pain)

I got about 2 hours of skirt sewing in today and I'm still not ready to attach it to the bodice. Why? Because chiffon is a pain in the ass, plain and simple. Sure, it's lovely and flowing, and one might even say ethereal. But for all that grace it takes a lot of swearing and pinning, and adjusting, and repeat. Oh, and it requires french seams, which means double the work. Argh. After multiple attempts at pinning, here's what I ended up with when attaching the front skirt panel to the back:


See how the bottom piece (the back) is longer than the top, by a good 2.5 inches? (Thank you blue lines of truth). I have no idea what happened here but the good news is it was the same way on the other side. This dress has a slight train that I was thinking of nixing anyway so it seems to me I now have the perfect reason to do so.

So, there are definite signs of progress albeit little ones. To keep the pipeline full though I'm already starting to think about the next project. I saw this at JCrew today and thought it might be the next thing. Notice the similarities:

It's tough to see in this McCall's pattern picture but I think with some minor tweaks we could have a good knockoff. And, the weather here is supposed to reach *gasp* 50 degrees tomorrow, with sun, so I'm itching for a spring project.

Related Posts with Thumbnails